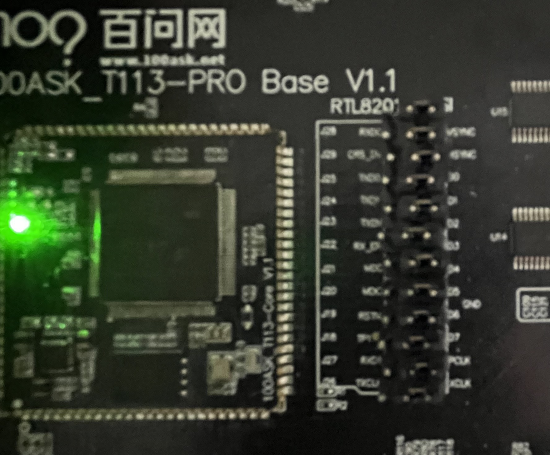
本实验采用百问网的100ASK_T113-PRO Base V1.1 ,链接:韦东山全志T113开发板
D1s也可以参考进行修改并适配。
本实验所需的文件(含tina根文件系统、SD镜像、设备树、内核配置文件)供大家对比参考:source.zip
Tina 测试镜像:tina_t113-100ask_uart3.img(使用该镜像时,需要连接七寸屏和ov5640摄像头)
本文章已在全志论坛实验成功:100ASK百问网 D1s/T113-s3开发板 适配ov5640 | 全志在线开发者论坛
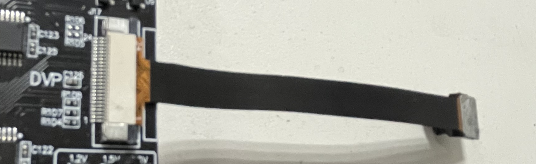
1.硬件配置查看百问网提供的T113开发板原理图100ASK_T113-Pro_Base-SCH.pdf
通过查看到第3页的摄像头原理图
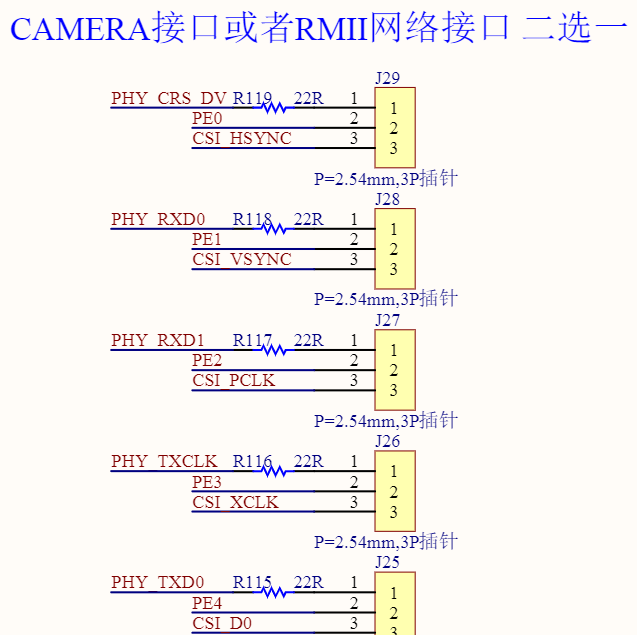
注意:T113中的网口和CSI接口复用,注意设备树中网口的PE的复用功能需要修改为CSI的PE的复用功能。需要在设备树中删除掉网口相关配置,防止占用。
文件名:sun8iw20p1-t113-100ask-t113-pro.dts
文件目录:buildroot_100ask_t113-pro/buildroot/output/build/linux-origin_master/arch/arm/boot/dts/
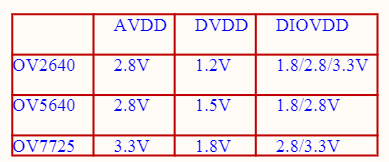
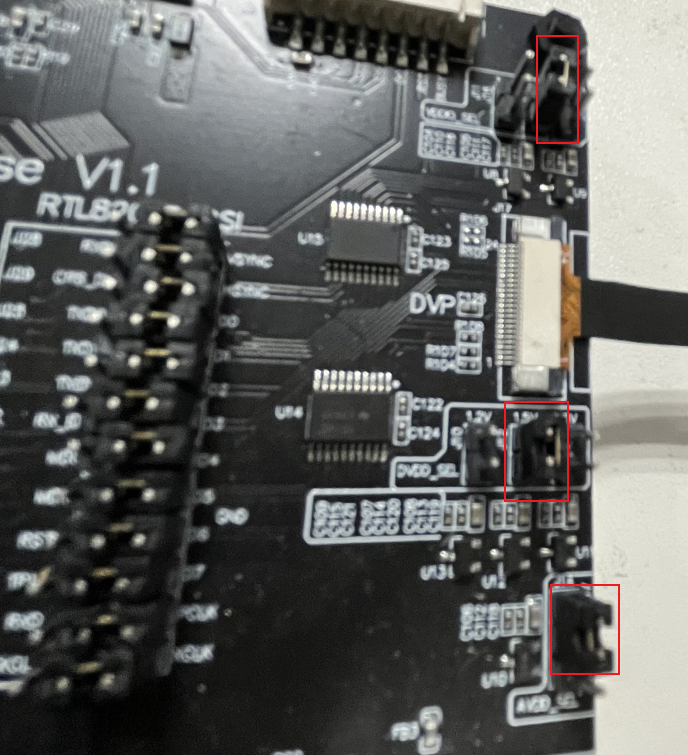
&vind0 { csi_top = <378000000>; csi_isp = <327000000>; status = "okay"; /* enable twi and ver1 spi-nand max freq 30M */ actuator0: actuator@5809450 { device_type = "actuator0"; actuator0_name = "ad5820_act"; actuator0_slave = <0x18>; actuator0_af_pwdn = <>; actuator0_afvdd = "afvcc-csi"; actuator0_afvdd_vol = <2800000>; status = "okay"; }; flash0: flash@5809460 { device_type = "flash0"; flash0_type = <2>; flash0_en = <>; flash0_mode = <>; flash0_flvdd = ""; flash0_flvdd_vol = <>; device_id = <0>; status = "okay"; }; sensor0: sensor@5809470 { reg = <0x0 0x05809470 0x0 0x10>; device_type = "sensor0"; compatible = "allwinner,sunxi-sensor"; sensor0_mname = "ov5640"; sensor0_twi_cci_id = <2>; sensor0_twi_addr = <0x78>; sensor0_mclk_id = <0>; sensor0_pos = "rear"; sensor0_isp_used = <0>; sensor0_fmt = <0>; sensor0_stby_mode = <0>; sensor0_vflip = <0>; sensor0_hflip = <0>; sensor0_iovdd-supply = <>; sensor0_iovdd_vol = <1800000>; sensor0_avdd-supply = <>; sensor0_avdd_vol = <2800000>; sensor0_dvdd-supply = <>; sensor0_dvdd_vol = <1500000>; sensor0_power_en = <>; sensor0_reset = <>; //sensor0_reset = <&pio PE 15 GPIO_ACTIVE_LOW>; //sensor0_pwdn = <&pio PE 14 GPIO_ACTIVE_LOW>; //sensor0_reset = <&pio PE 13 GPIO_ACTIVE_LOW>; sensor0_pwdn = <>; sensor0_sm_vs = <>; flash_handle = <&flash0>; act_handle = <&actuator0>; device_id = <0>; status = "okay"; }; sensor1:sensor@5809480 { device_type = "sensor1"; sensor1_mname = "ov5647"; sensor1_twi_cci_id = <3>; sensor1_twi_addr = <0x6c>; sensor1_mclk_id = <1>; sensor1_pos = "front"; sensor1_isp_used = <0>; sensor1_fmt = <0>; sensor1_stby_mode = <0>; sensor1_vflip = <0>; sensor1_hflip = <0>; sensor1_iovdd-supply = <>; sensor1_iovdd_vol = <>; sensor1_avdd-supply = <>; sensor1_avdd_vol = <>; sensor1_dvdd-supply = <>; sensor1_dvdd_vol = <>; sensor1_power_en = <>; sensor1_reset = <&pio PE 7 GPIO_ACTIVE_LOW>; sensor1_pwdn = <&pio PE 6 GPIO_ACTIVE_LOW>; status = "disabled"; }; vinc0:vinc@5809000 { vinc0_csi_sel = <0>; vinc0_mipi_sel = <0xff>; vinc0_isp_sel = <0>; vinc0_isp_tx_ch = <0>; vinc0_tdm_rx_sel = <0xff>; vinc0_rear_sensor_sel = <0>; vinc0_front_sensor_sel = <0>; vinc0_sensor_list = <0>; status = "okay"; }; vinc1:vinc@5809200 { vinc1_csi_sel = <0>; vinc1_mipi_sel = <0xff>; vinc1_isp_sel = <0>; vinc1_isp_tx_ch = <1>; vinc1_tdm_rx_sel = <0xff>; vinc1_rear_sensor_sel = <0>; vinc1_front_sensor_sel = <1>; vinc1_sensor_list = <0>; status = "disabled"; }; };文件名:sun8iw20p1.dtsi
文件目录:buildroot_100ask_t113-pro/buildroot/output/build/linux-origin_master/arch/arm/boot/dts/
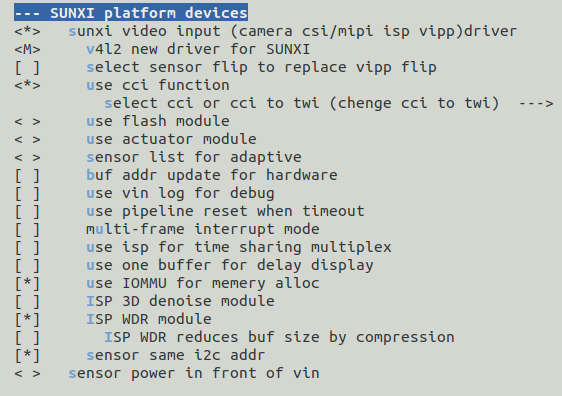
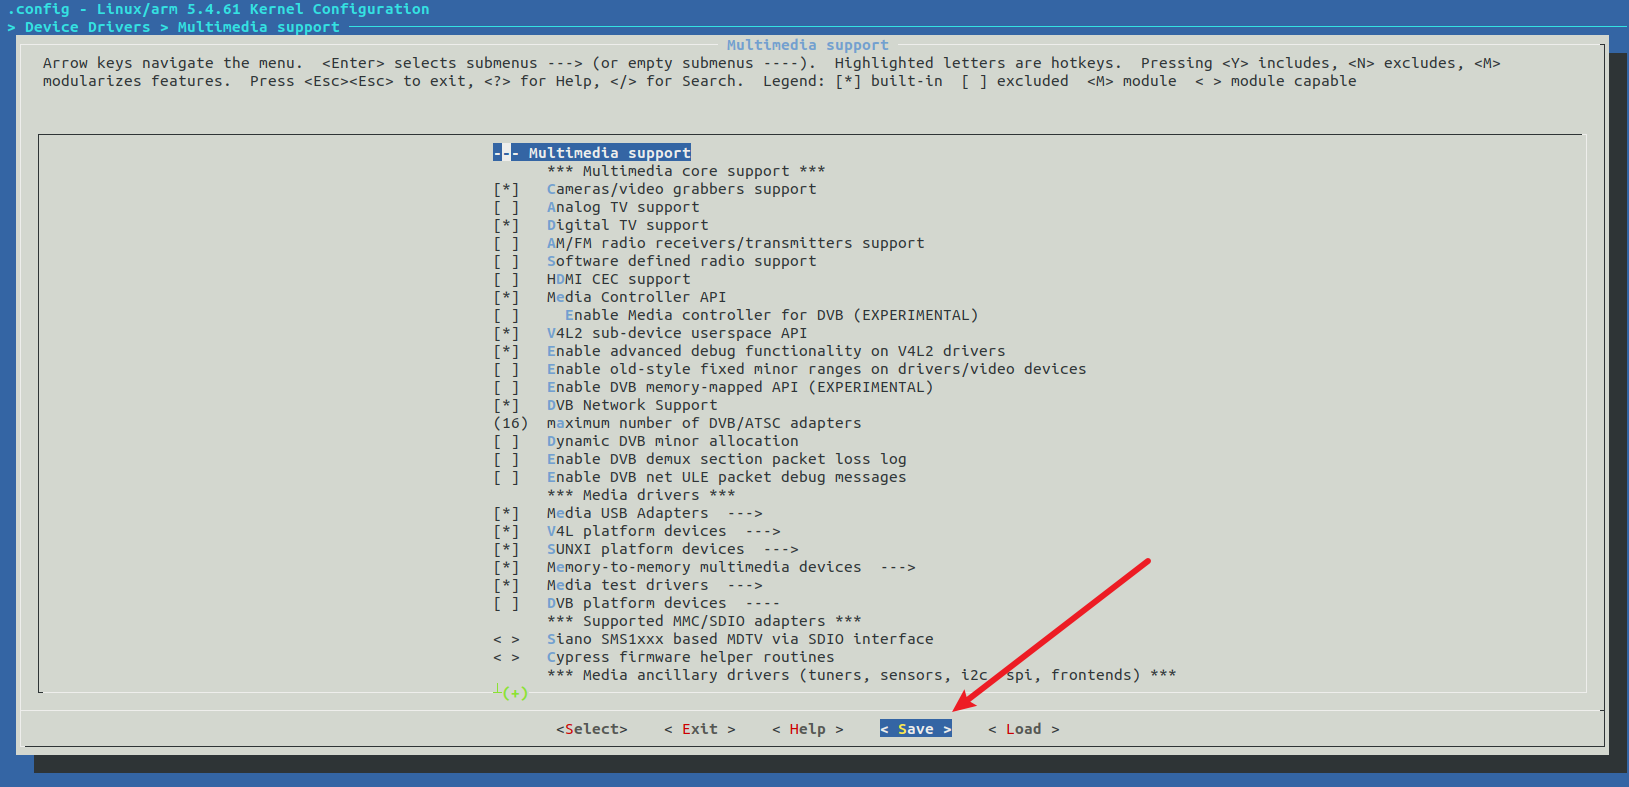
vind0: vind@5800800 { compatible = "allwinner,sunxi-vin-media", "simple-bus"; #address-cells = <2>; #size-cells = <2>; ranges; device_id = <0>; csi_top = <336000000>; csi_isp = <327000000>; reg = <0x0 0x05800800 0x0 0x200>, <0x0 0x05800000 0x0 0x800>; clocks = <&ccu CLK_CSI_TOP>, <&ccu CLK_PLL_VIDEO1_2X>, <&ccu CLK_CSI0_MCLK>, <&dcxo24M>, <&ccu CLK_PLL_VIDEO1>, <&ccu CLK_BUS_CSI>, <&ccu CLK_MBUS_CSI>; clock-names = "csi_top", "csi_top_src", "csi_mclk0", "csi_mclk0_24m", "csi_mclk0_pll", "csi_bus", "csi_mbus"; resets = <&ccu RST_BUS_CSI>; reset-names = "csi_ret"; pinctrl-names = "mclk0-default", "mclk0-sleep"; pinctrl-0 = <&csi_mclk0_pins_a>; pinctrl-1 = <&csi_mclk0_pins_b>; status = "okay"; csi0: csi@5801000{ compatible = "allwinner,sunxi-csi"; reg = <0x0 0x05801000 0x0 0x1000>; interrupts = <GIC_SPI 100 IRQ_TYPE_LEVEL_HIGH>; pinctrl-names = "default","sleep"; pinctrl-0 = <&csi0_pins_a>; pinctrl-1 = <&csi0_pins_b>; device_id = <0>; iommus = <&mmu_aw 1 1>; status = "okay"; }; isp0: isp@5809410 { compatible = "allwinner,sunxi-isp"; reg = <0x0 0x05809410 0x0 0x10>; device_id = <0xfe>; status = "okay"; }; isp1: isp@5809420 { compatible = "allwinner,sunxi-isp"; reg = <0x0 0x05809420 0x0 0x10>; device_id = <0xff>; status = "okay"; }; scaler0: scaler@5809430 { compatible = "allwinner,sunxi-scaler"; reg = <0x0 0x05809430 0x0 0x10>; device_id = <0xfe>; status = "okay"; }; scaler1: scaler@5809440 { compatible = "allwinner,sunxi-scaler"; reg = <0x0 0x05809440 0x0 0x10>; device_id = <0xff>; status = "okay"; }; actuator0: actuator@5809450 { compatible = "allwinner,sunxi-actuator"; device_type = "actuator0"; reg = <0x0 0x05809450 0x0 0x10>; actuator0_name = "ad5820_act"; actuator0_slave = <0x18>; actuator0_af_pwdn = <>; actuator0_afvdd = "afvcc-csi"; actuator0_afvdd_vol = <2800000>; status = "disabled"; }; flash0: flash@5809460 { device_type = "flash0"; compatible = "allwinner,sunxi-flash"; reg = <0x0 0x05809460 0x0 0x10>; flash0_type = <2>; flash0_en = <>; flash0_mode = <>; flash0_flvdd = ""; flash0_flvdd_vol = <>; device_id = <0>; status = "disabled"; }; sensor0: sensor@5809470 { reg = <0x0 0x05809470 0x0 0x10>; device_type = "sensor0"; compatible = "allwinner,sunxi-sensor"; sensor0_mname = "ov5640"; sensor0_twi_cci_id = <2>; sensor0_twi_addr = <0x78>; sensor0_mclk_id = <0>; sensor0_pos = "rear"; sensor0_isp_used = <0>; sensor0_fmt = <0>; sensor0_stby_mode = <0>; sensor0_vflip = <0>; sensor0_hflip = <0>; sensor0_iovdd-supply = <>; sensor0_iovdd_vol = <>; sensor0_avdd-supply = <>; sensor0_avdd_vol = <>; sensor0_dvdd-supply = <>; sensor0_dvdd_vol = <>; sensor0_power_en = <>; sensor0_reset = <&pio PE 9 GPIO_ACTIVE_LOW>; sensor0_pwdn = <&pio PE 8 GPIO_ACTIVE_LOW>; sensor0_sm_vs = <>; flash_handle = <&flash0>; act_handle = <&actuator0>; device_id = <0>; status = "okay"; }; sensor1: sensor@5809480 { reg = <0x0 0x05809480 0x0 0x10>; device_type = "sensor1"; compatible = "allwinner,sunxi-sensor"; sensor1_mname = "ov5647"; sensor1_twi_cci_id = <3>; sensor1_twi_addr = <0x6c>; sensor1_mclk_id = <1>; sensor1_pos = "front"; sensor1_isp_used = <0>; sensor1_fmt = <0>; sensor1_stby_mode = <0>; sensor1_vflip = <0>; sensor1_hflip = <0>; sensor1_iovdd-supply = <>; sensor1_iovdd_vol = <>; sensor1_avdd-supply = <>; sensor1_avdd_vol = <>; sensor1_dvdd-supply = <>; sensor1_dvdd_vol = <>; sensor1_power_en = <>; sensor1_reset = <&pio PE 7 GPIO_ACTIVE_LOW>; sensor1_pwdn = <&pio PE 6 GPIO_ACTIVE_LOW>; sensor1_sm_vs = <>; flash_handle = <>; act_handle = <>; device_id = <1>; status = "okay"; }; vinc0: vinc@5809000 { compatible = "allwinner,sunxi-vin-core"; device_type = "vinc0"; reg = <0x0 0x05809000 0x0 0x200>; interrupts = <GIC_SPI 95 IRQ_TYPE_LEVEL_HIGH>; vinc0_csi_sel = <0>; vinc0_mipi_sel = <0xff>; vinc0_isp_sel = <0>; vinc0_tdm_rx_sel = <0xff>; vinc0_rear_sensor_sel = <0>; vinc0_front_sensor_sel = <0>; vinc0_sensor_list = <0>; device_id = <0>; iommus = <&mmu_aw 1 1>; status = "okay"; }; vinc1: vinc@5809200 { device_type = "vinc1"; compatible = "allwinner,sunxi-vin-core"; reg = <0x0 0x05809200 0x0 0x200>; interrupts = <GIC_SPI 96 IRQ_TYPE_LEVEL_HIGH>; vinc1_csi_sel = <0>; vinc1_mipi_sel = <0xff>; vinc1_isp_sel = <1>; vinc1_tdm_rx_sel = <0xff>; vinc1_rear_sensor_sel = <0>; vinc1_front_sensor_sel = <0>; vinc1_sensor_list = <0>; device_id = <1>; iommus = <&mmu_aw 1 1>; status = "okay"; }; }; 3.修改内核配置在buildroot目录下,输入
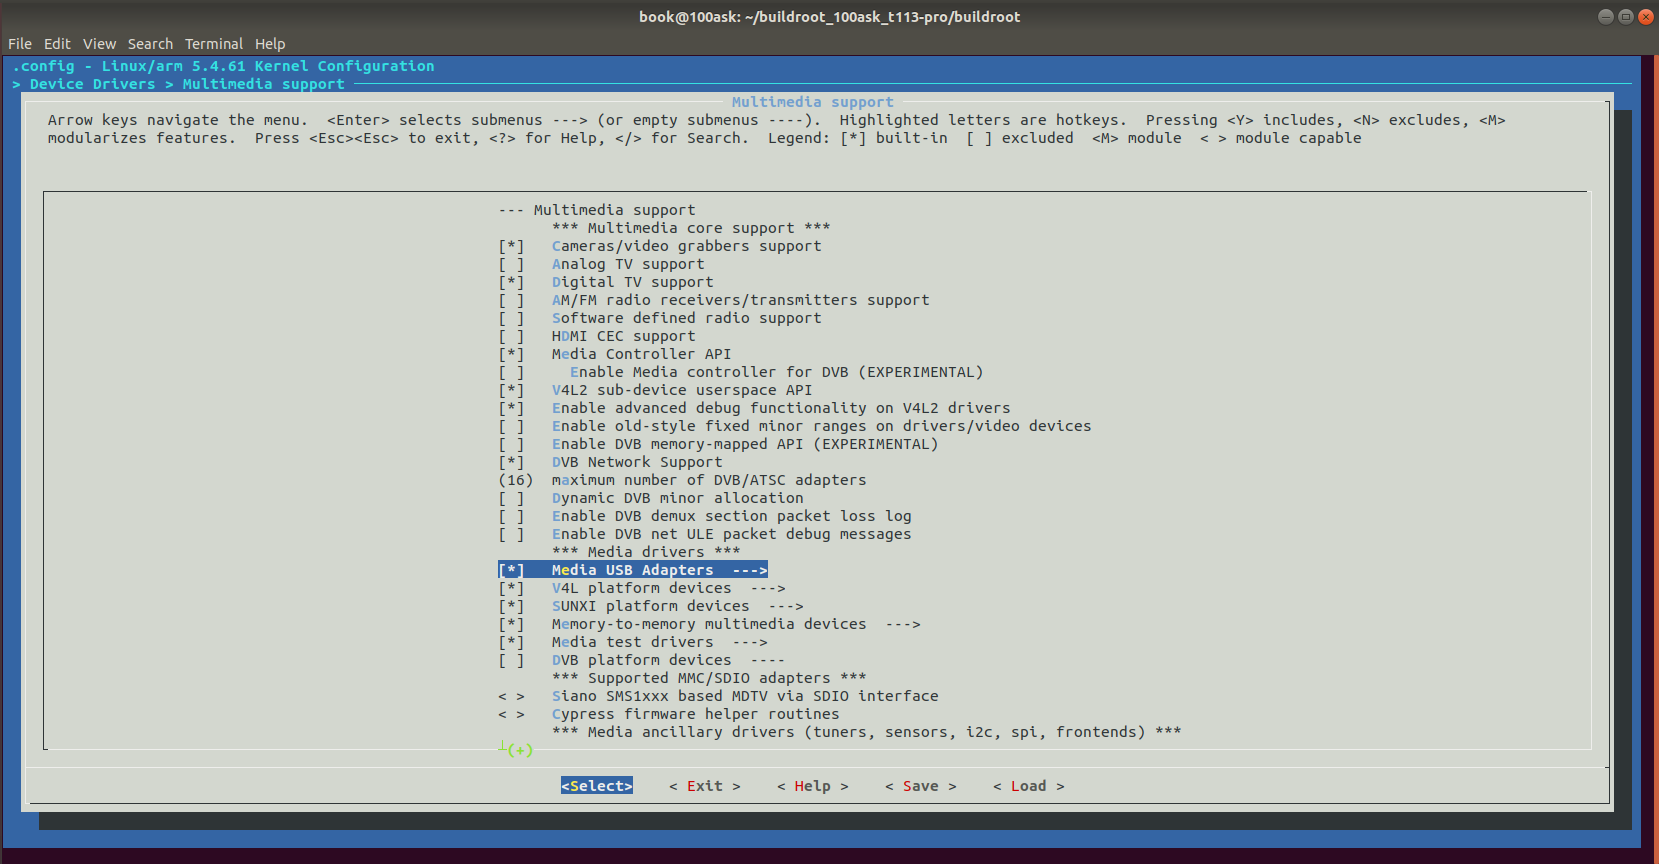
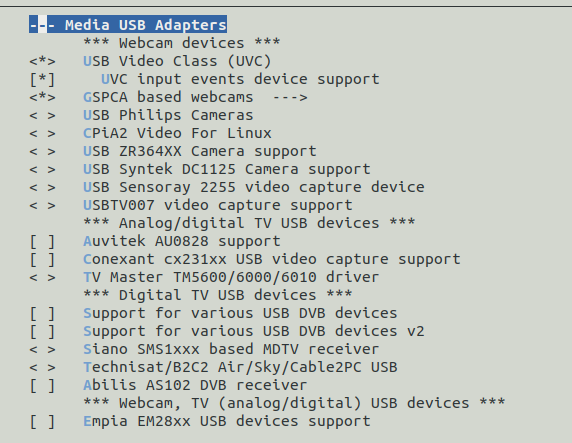
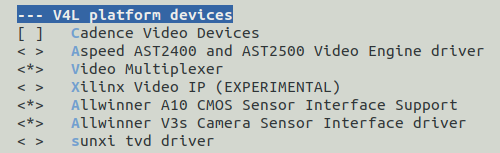
make linux-menuconfig

在buildroot目录下执行
make linux-rebuild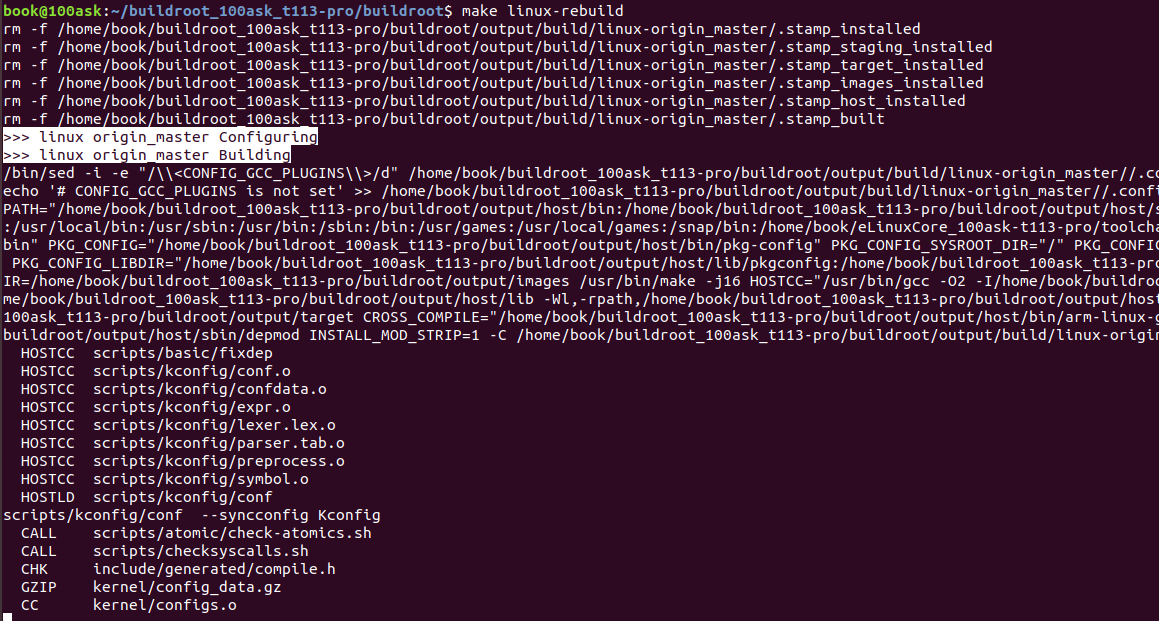
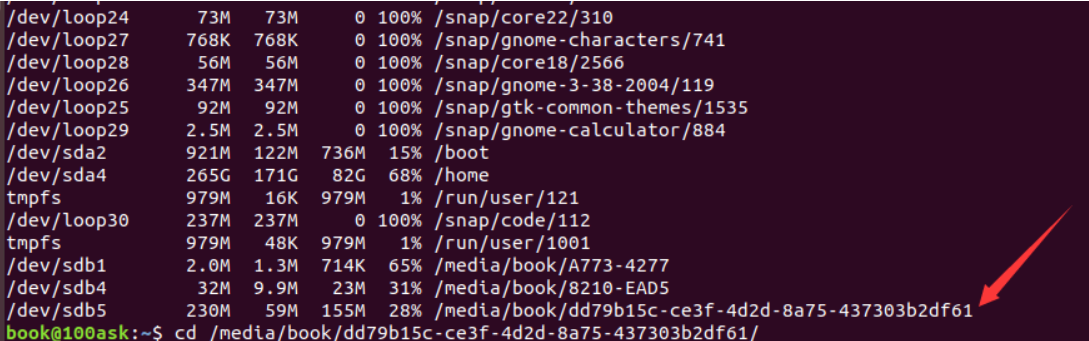
将烧录到sd卡的t113系统挂载到ubuntu中 使用 df -h 查看分区
拷贝lib中的驱动到桌面备用
sudo cp -rf lib/modules/5.4.61 ~/Desktop删除全部文件
sudo rm -rf *
进入lib/modules目录下删除5.4.61文件夹
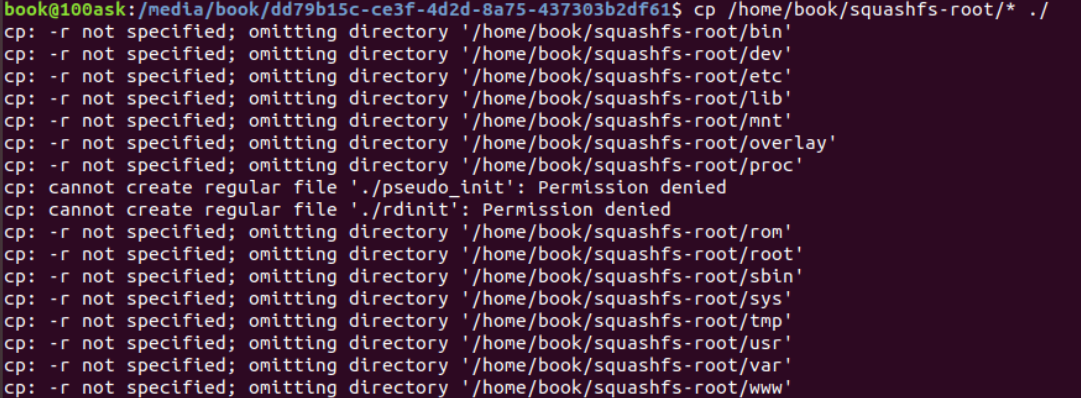
cd lib/modules/ sudo rm -rf 5.4.61将5.4.61文件夹拷贝回去
sudo cp ~/Desktop/5.4.61/ ./ -rf从虚拟机中弹出SD卡。
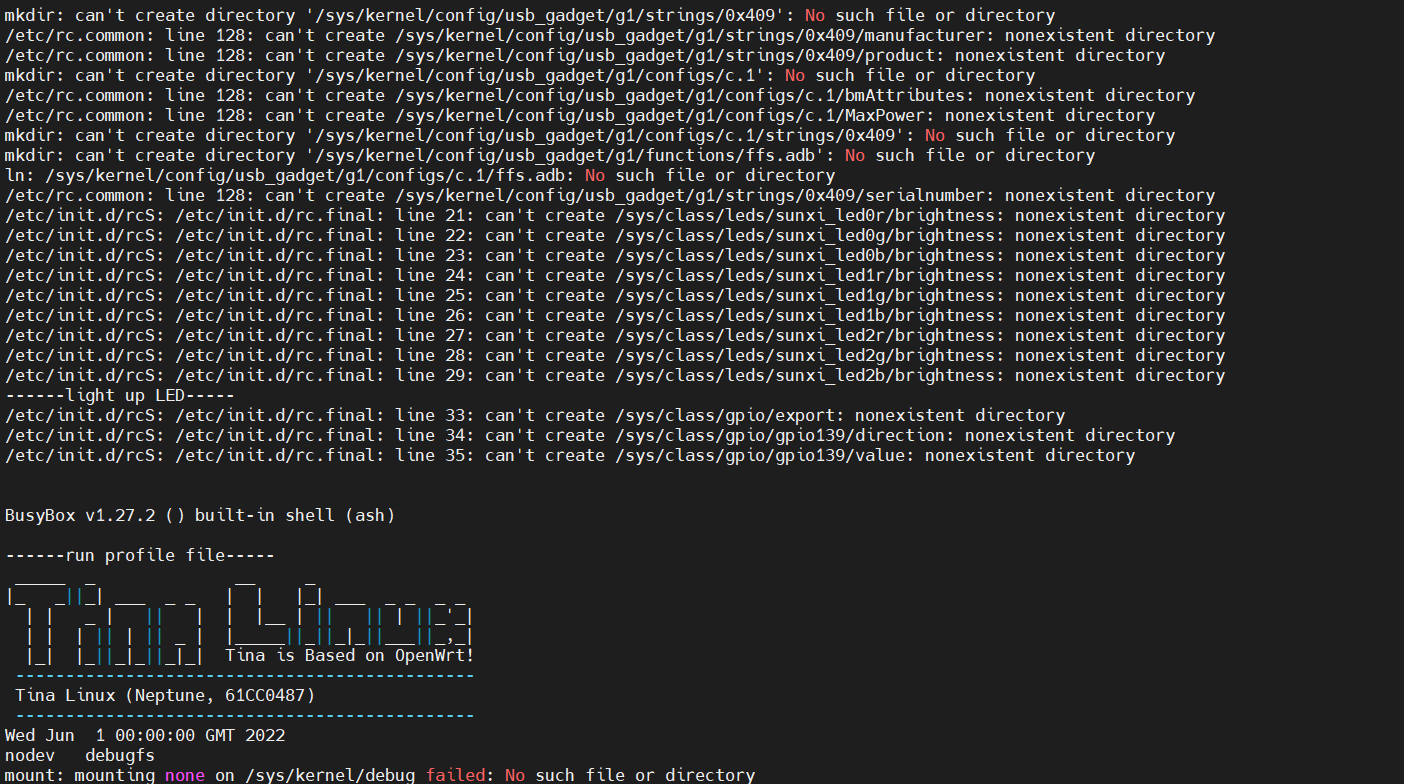
6.使用camerademo测试将SD卡插入T113开发板,上电启动。启动界面如下:
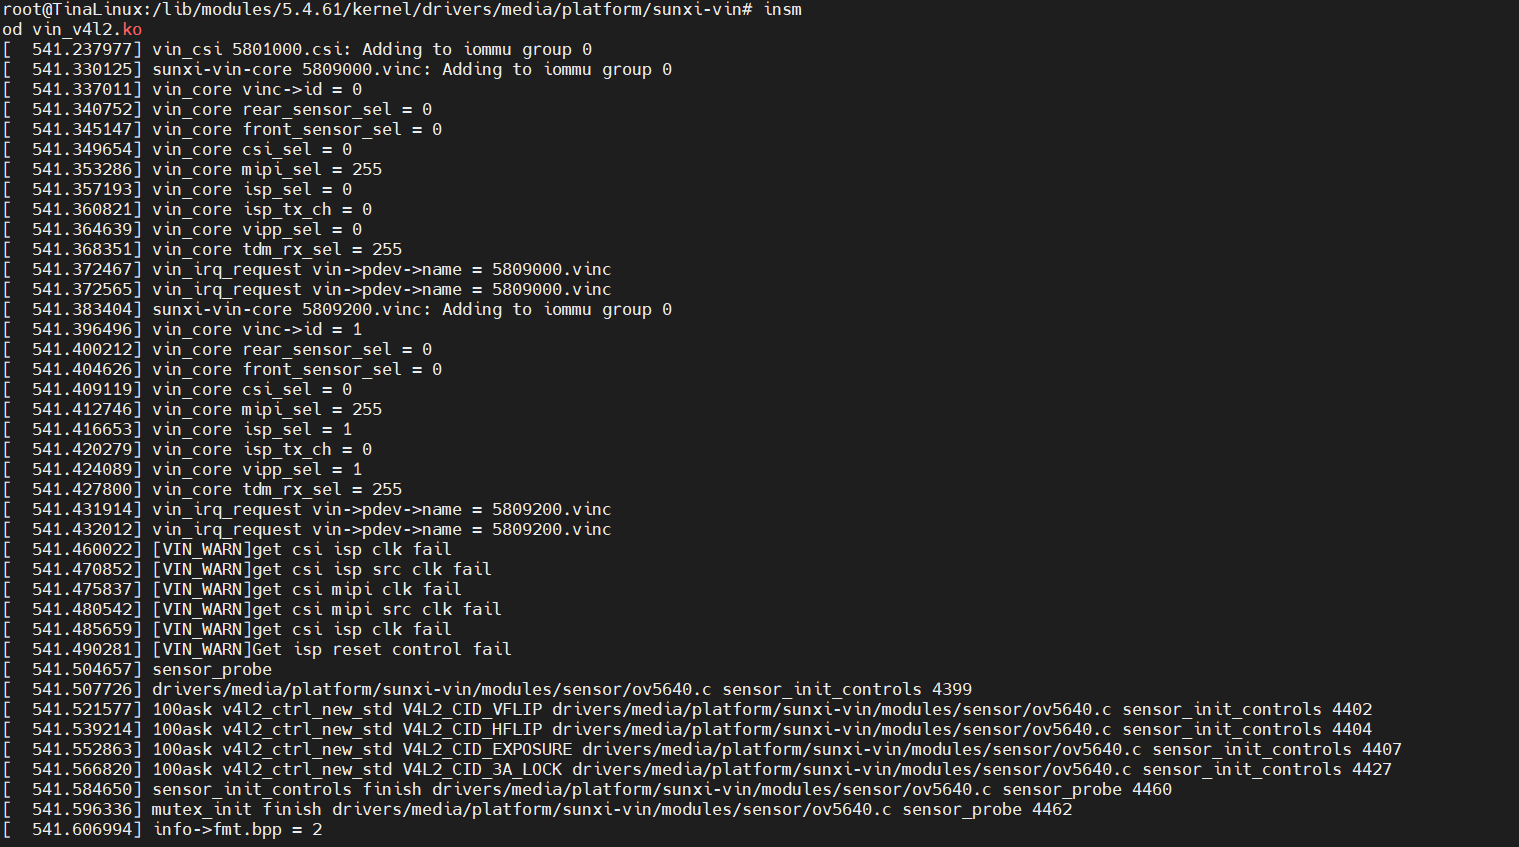
装载vin_io.ko驱动

装载ov5640.ko驱动:
insmod ov5640.ko

插入U盘或无系统的TF卡将获取到的图片提取出来查看。
挂载U盘。
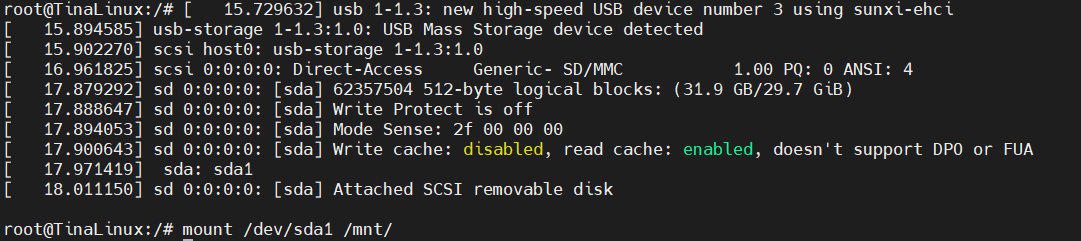
使用camerademo拍摄照片,存放到U盘内
camerademo NV21 640 480 30 bmp /mnt 5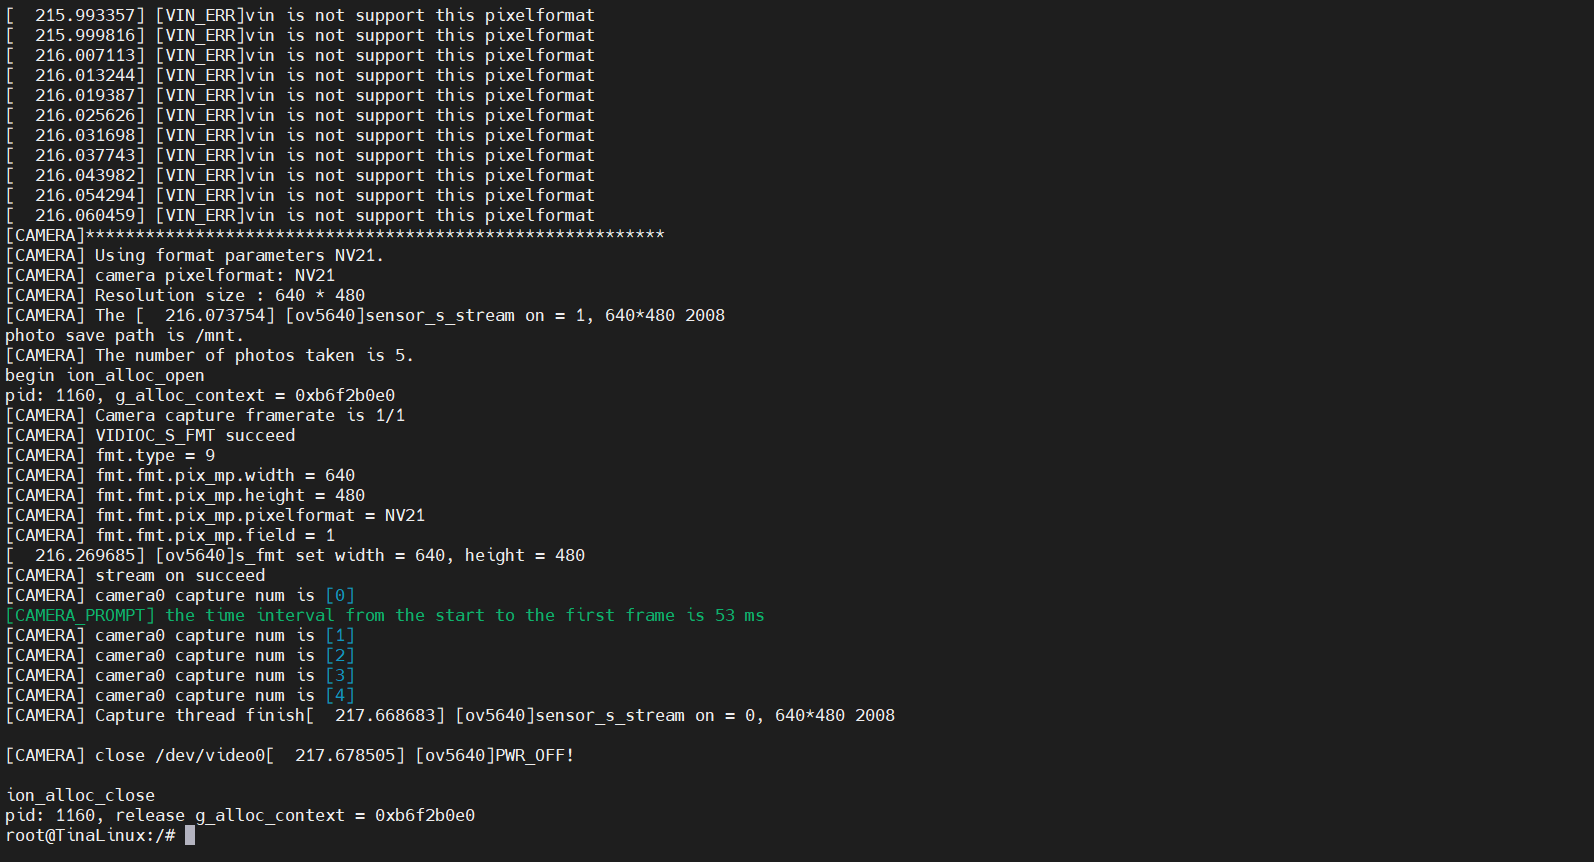
拔下u盘,插入电脑中,即可查看到刚刚在T113开发板上使用ov5640拍摄的5张照片


